TANDOORI ROTI
Tandoori Roti Without Oven
How about trying out tandoori roti without oven?
It’s best and tastes great. During our childhood used to setup “Sanjha Chulha” meaning all the ladies of a same neighborhood would cook their rotis on a single stove.
By the evening hour, our mom and aunties with their dough would head to biji’s place. Ladies and biji would sit on a “moda” (stool) and make rotis for everyone. By the end of the day some 60-70 rotis were made on that single tandoor and all the ladies would return home to enjoy food with their families.
Today I making these and the sight and smell of these rotis is making me nostalgic. 🙁 Back in 2000, when I visited her she showed me a cool way to make tandoori rotis in an old kadai or in a cooker.
Living far from her, I always try her method to make my tandoori rotis and it adds a zing to my meal. Nothing complicated a simple and easy recipe. After kneading the dough, roll it out like rotis. I have shown two ways to roll out the rotis. In biji’s words, it’s called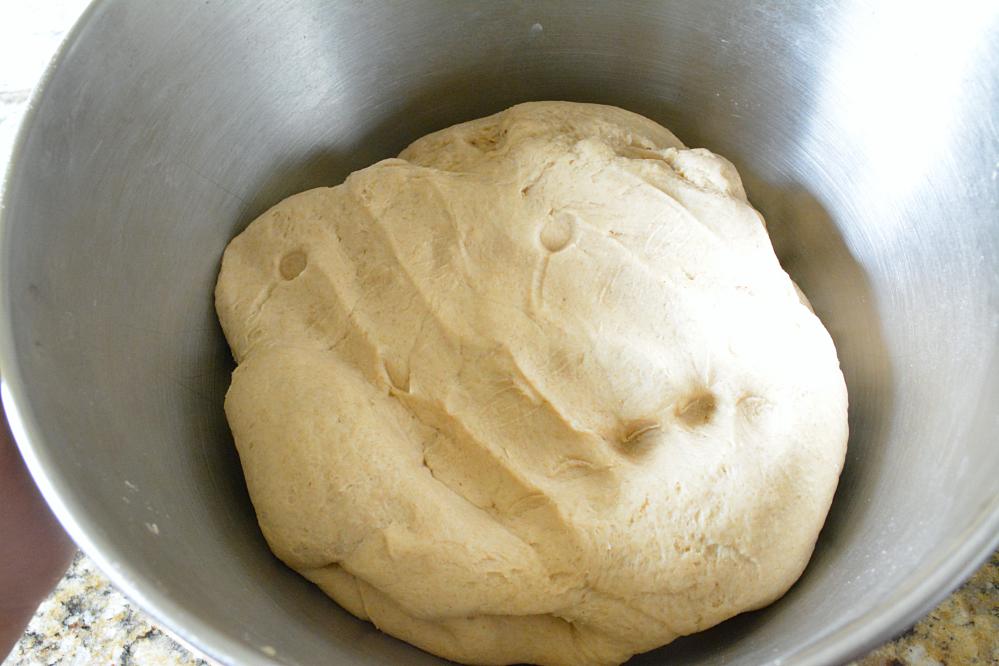
“Paleche wali roti”
meaning “Roti in layers“. Follow the step by step guide below to see how to form layers in a simple roti.
I have kneaded my dough with curd,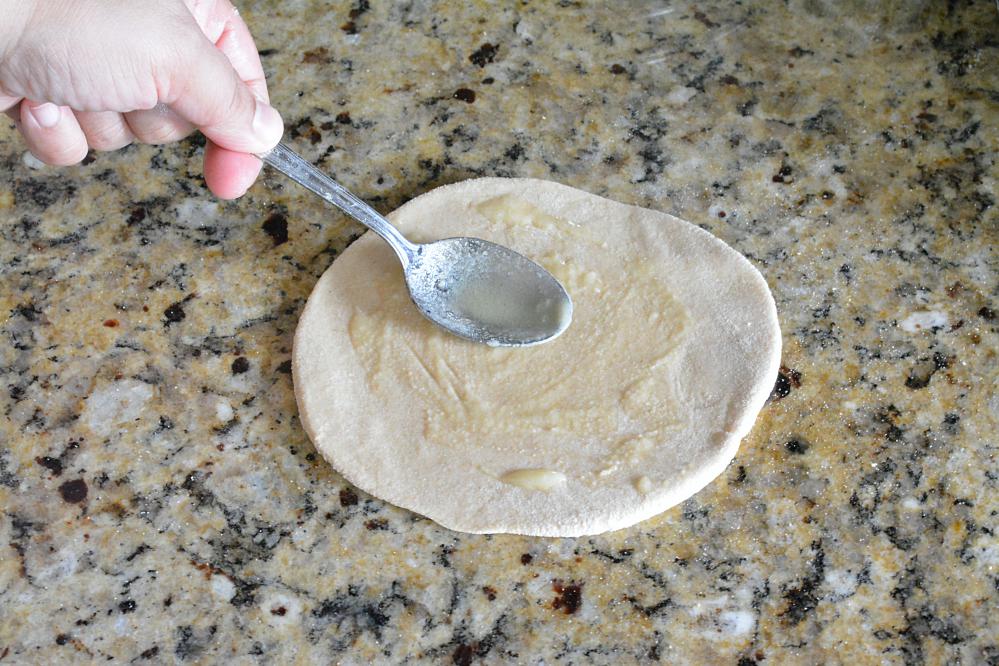 but you can use buttermilk- this will keep the rotis soft. Use an old kadai or cooker for this purpose (old kadai – you can use).
Apply water to one part of the roti as applying water will ensure that the roti is stuck to the utensil and it will not fall on the stove during cooking process. Couple of first ones will stick to the kadai, no worries – use a flat spatula and remove them off the kadai. After that cooking rotis will be a breeze. Generously apply some ghee/butter and enjoy these warm rotis with Dal Tadka or Achari gobhi and have a wonderful meal tonight! Have you tried this recipe?
Wheat flour flatbread cooked on stove.
Prep Time 10 mins Cook Time 20 mins Total Time 30 mins Servings 10 ROTIS INGREDIENTS 1X2X3X 2-1/4 cup Wheat Flour (Atta) 1/2 cup Curd/buttermilk 3/4 cup Water (appx.) Salt to taste 1/2 -1 tablespoon Oil to finish up the dough 3 – 4 tablespoon Ghee to brush all the rotis
INSTRUCTIONS
Add all the ingredients (leaving out ghee) and knead a soft pliable dough. Heat a old kadai. Take a golf size ball of wheat dough and roll it into a small circle.
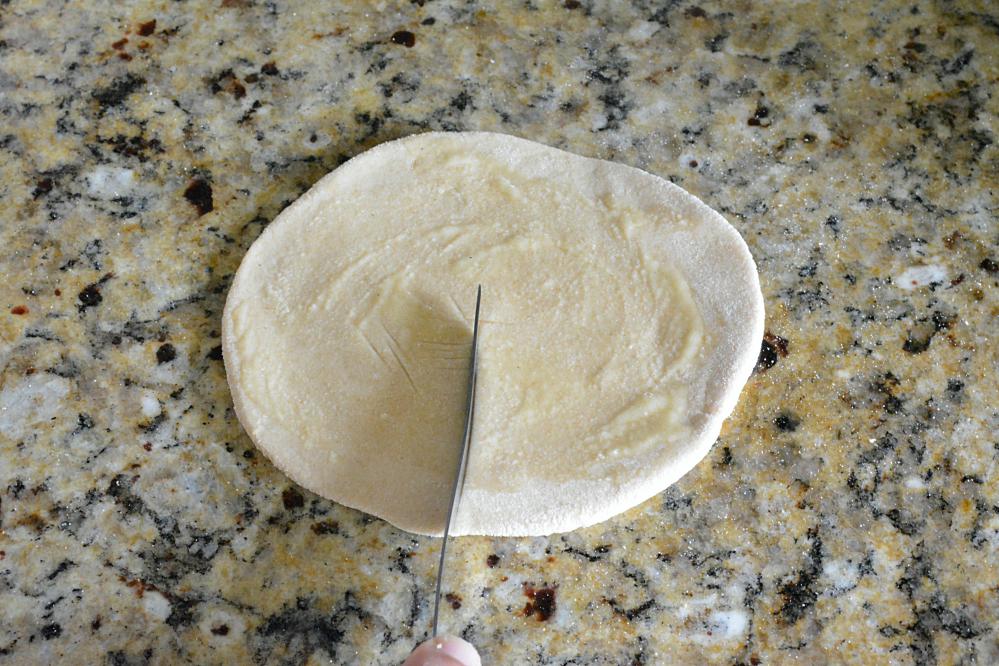
FIRST METHOD – Spread oil/ghee on the circle. Using a knife, cut the circle from one end. 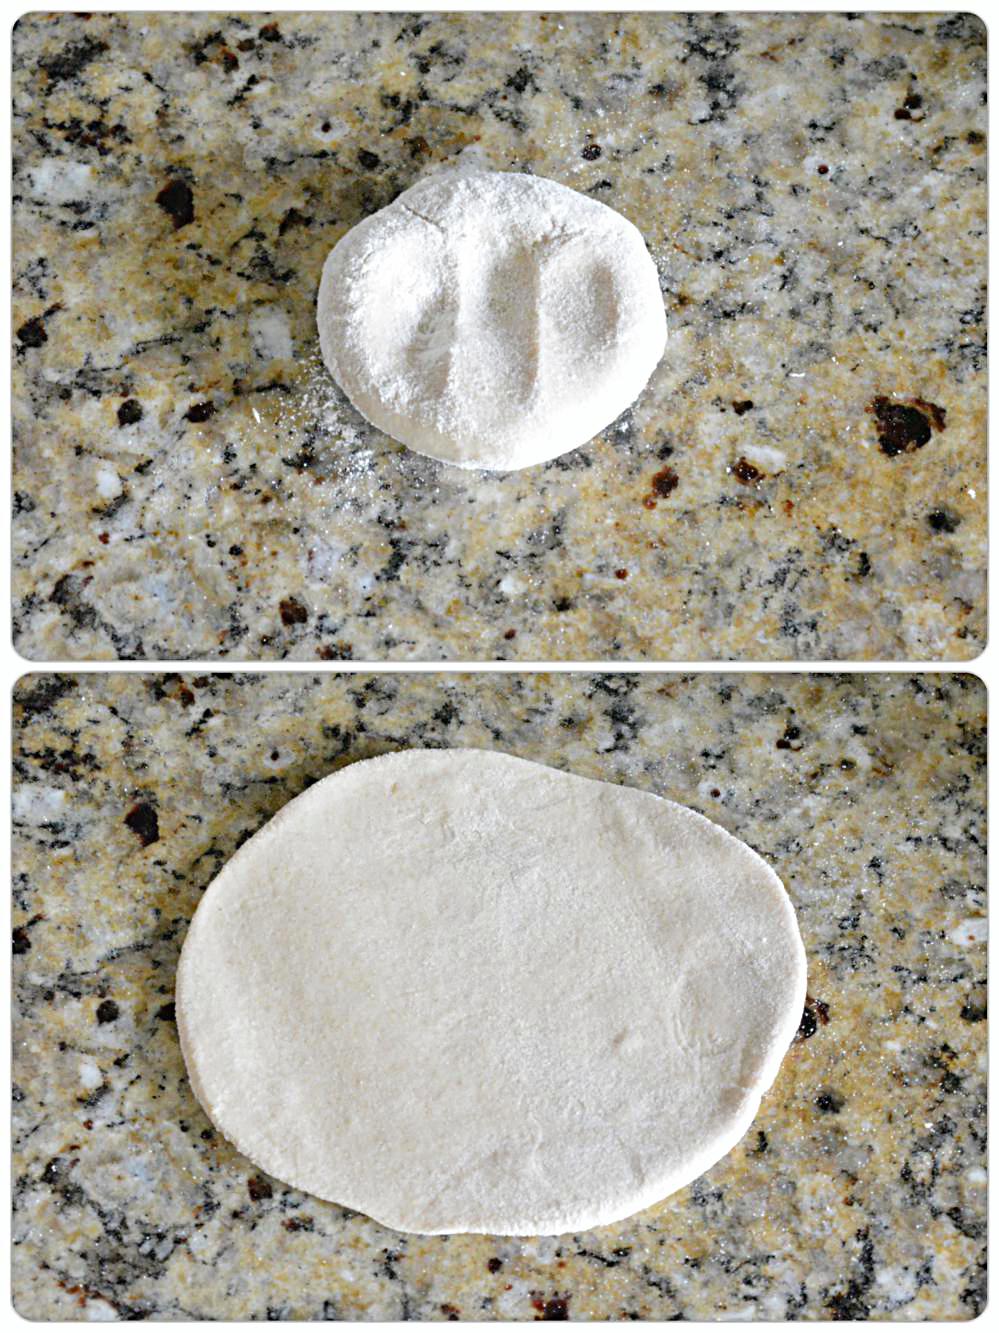
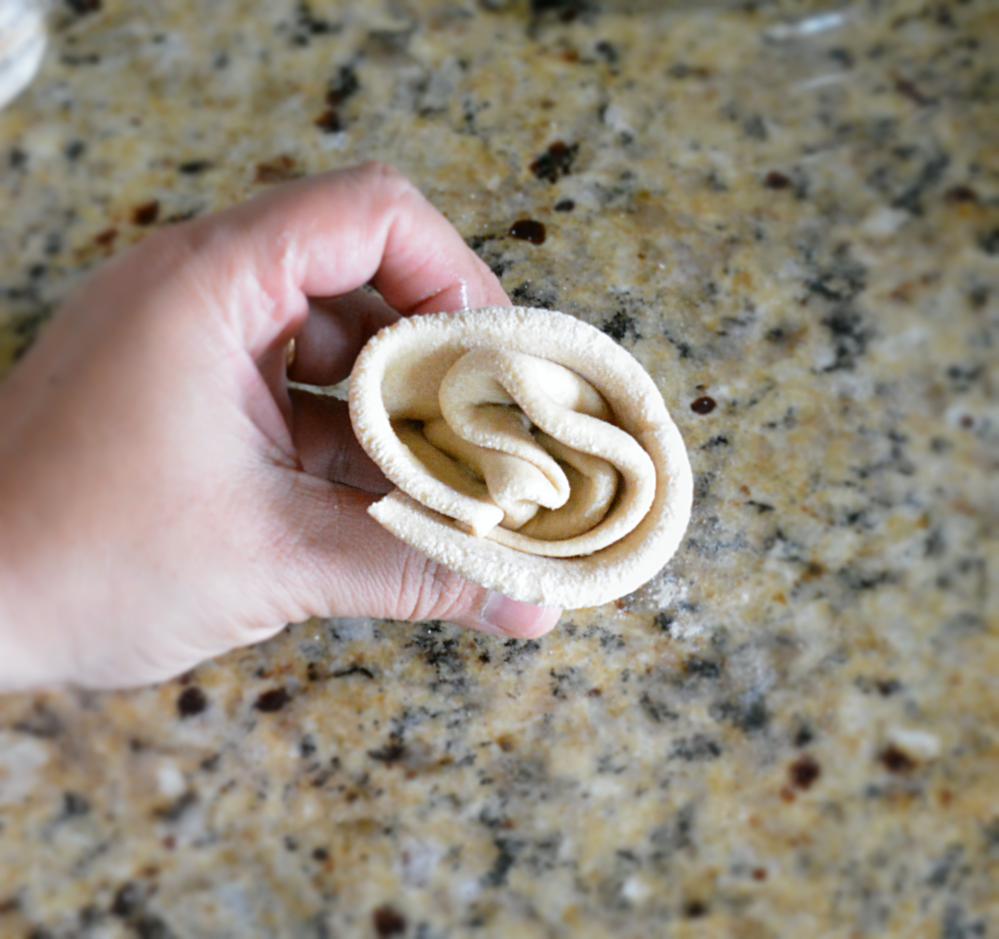

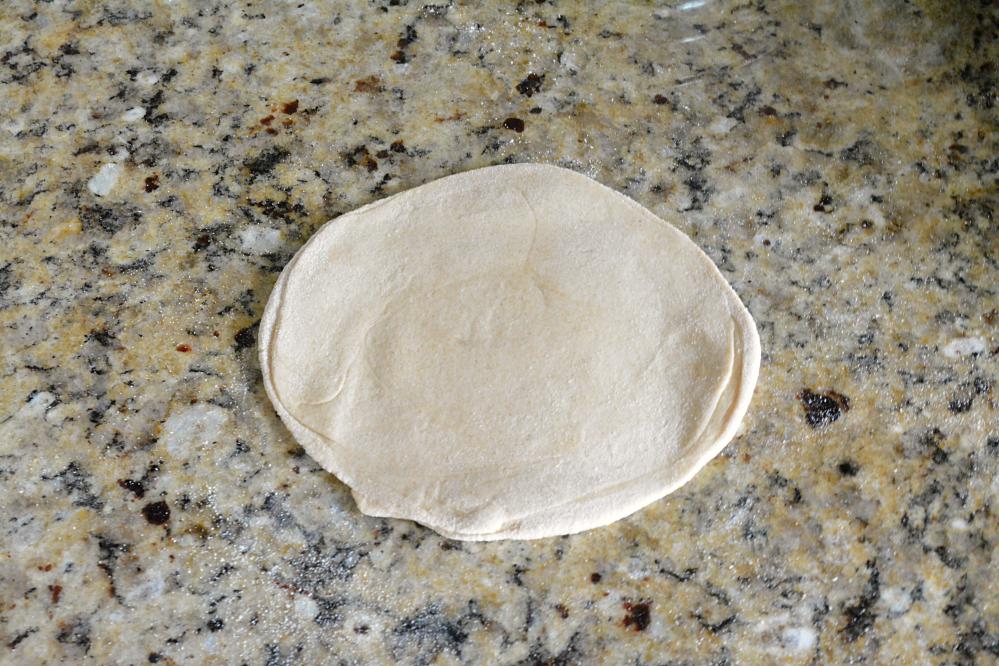
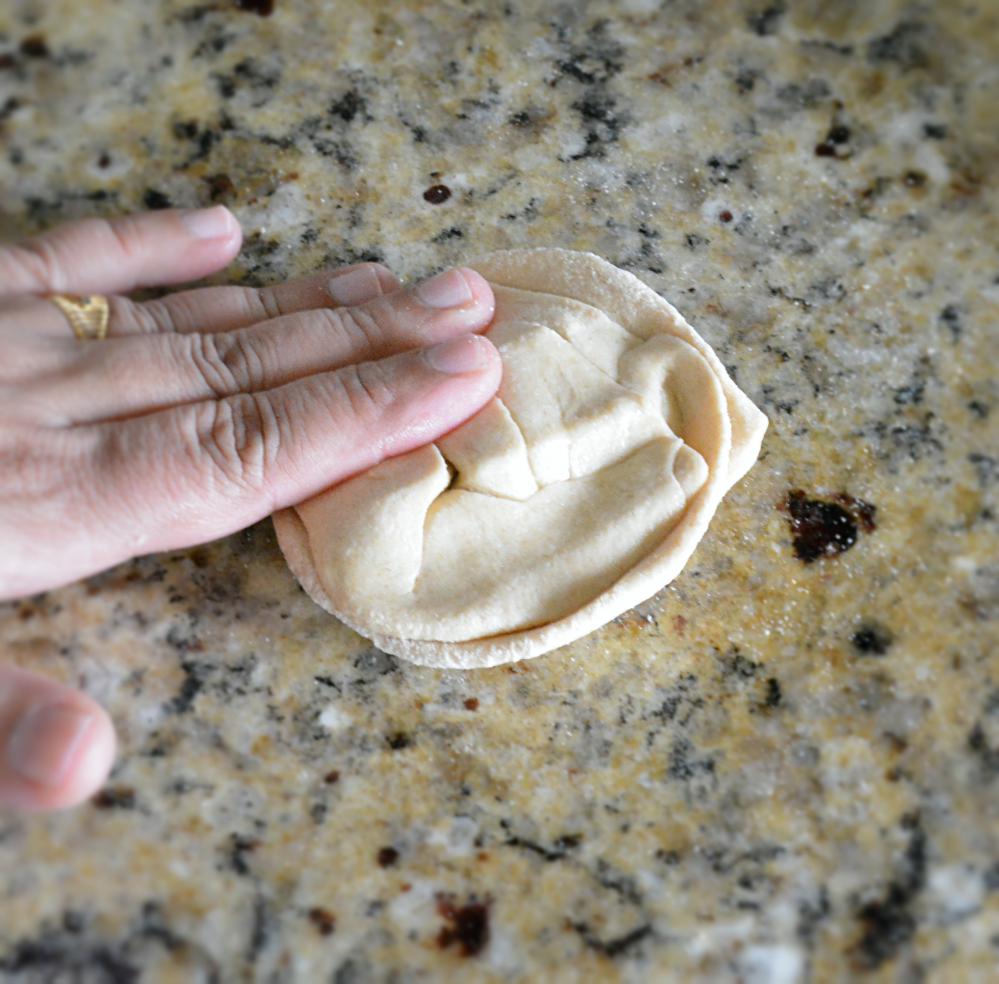
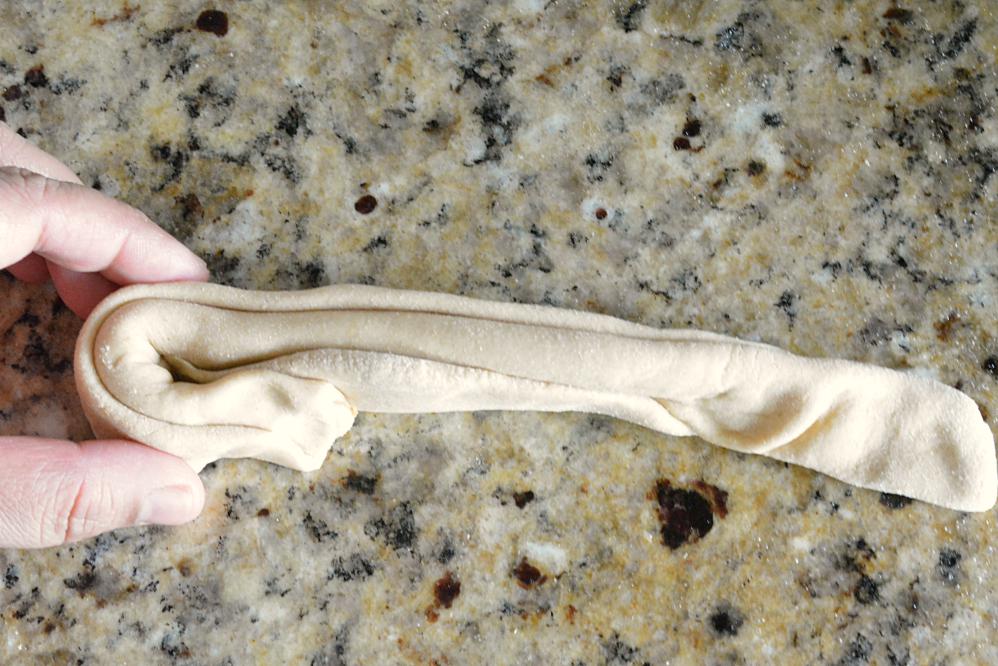

Beginning from one end start rolling the circle. Keep rolling… Till you reach the other end. It should look like a flower bud..as shown in the picture. Start pressing down on the dough. Press it down completely and make it look like a ball again; but with layers. Dust it with dry flour and roll it into a circle.
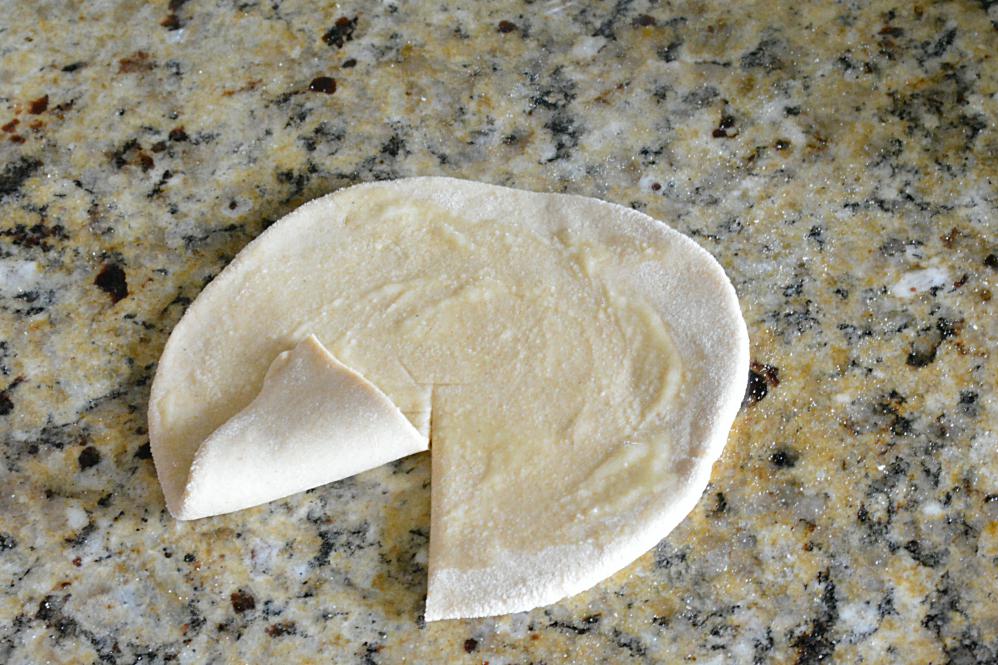
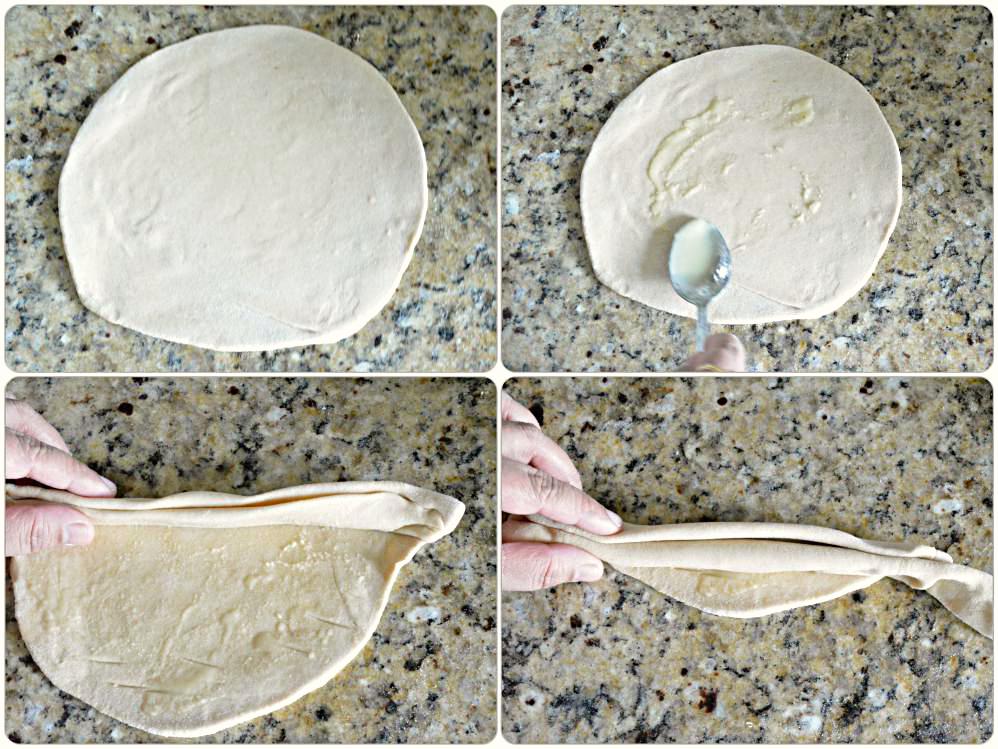
SECOND METHOD – Roll the dough ball into a big circle. Apply ghee/oil all over the circle. Start folding the circle in folds…as shown in the pictures. After you have folded the circle, start rolling it… Keep rolling till you reach the end. Secure the end part and press it down. Roll it like a roti or a big circle.
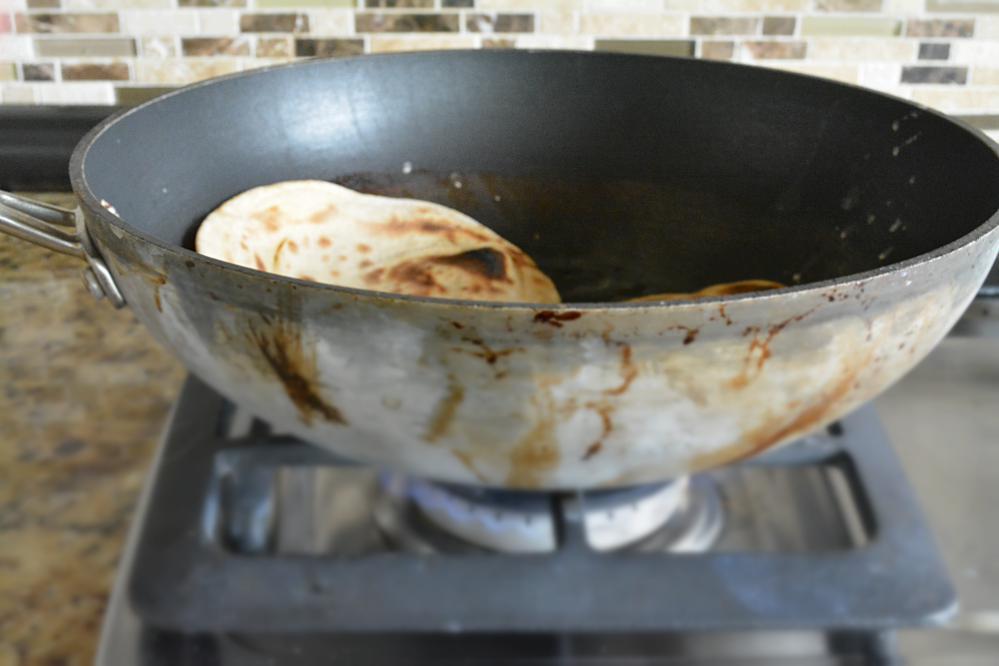
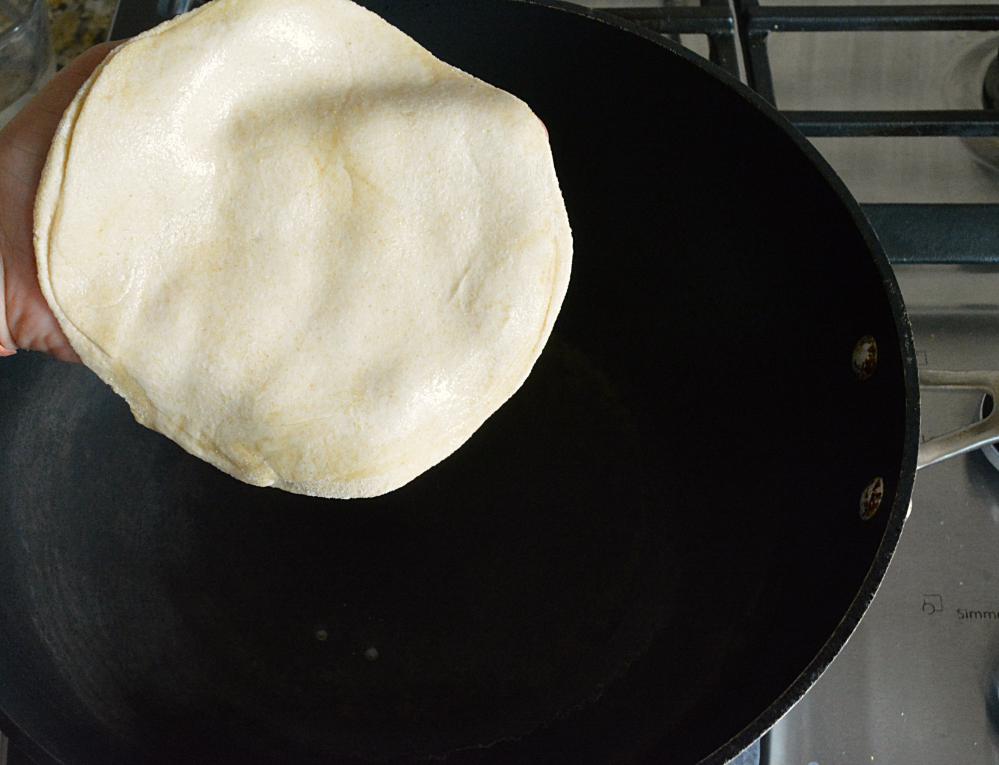
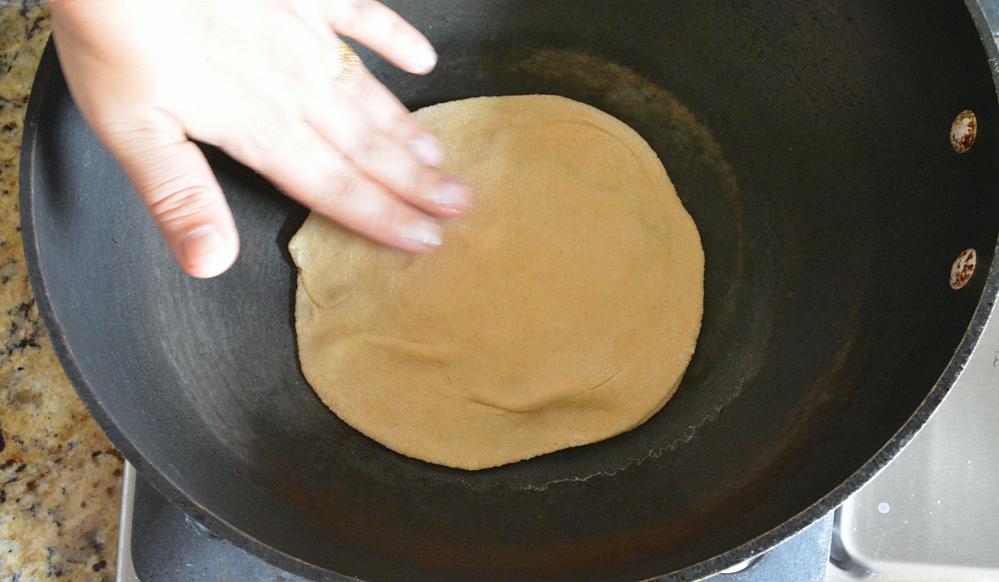
Apply water on one side… Lift the roti.. And place it inside the warm kadai. Press it down. 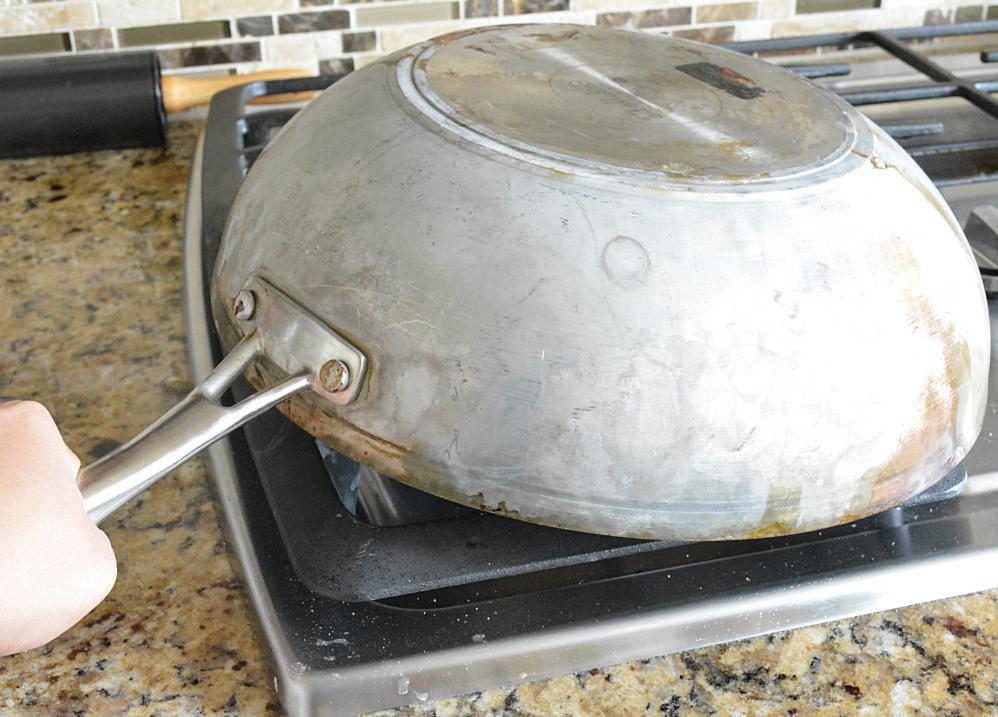 You can even do two at a time, depending on big your kadai is. Keep the flame on medium, and turn the kadai upside down on the cook top. Keep checking in between. If you like your rotis to be less crispy, then lower the flame and cook. Some rotis may get stuck to the kadai, no worries. Using a flat spatula, gently apply some pressure and the rotis will come out easily.
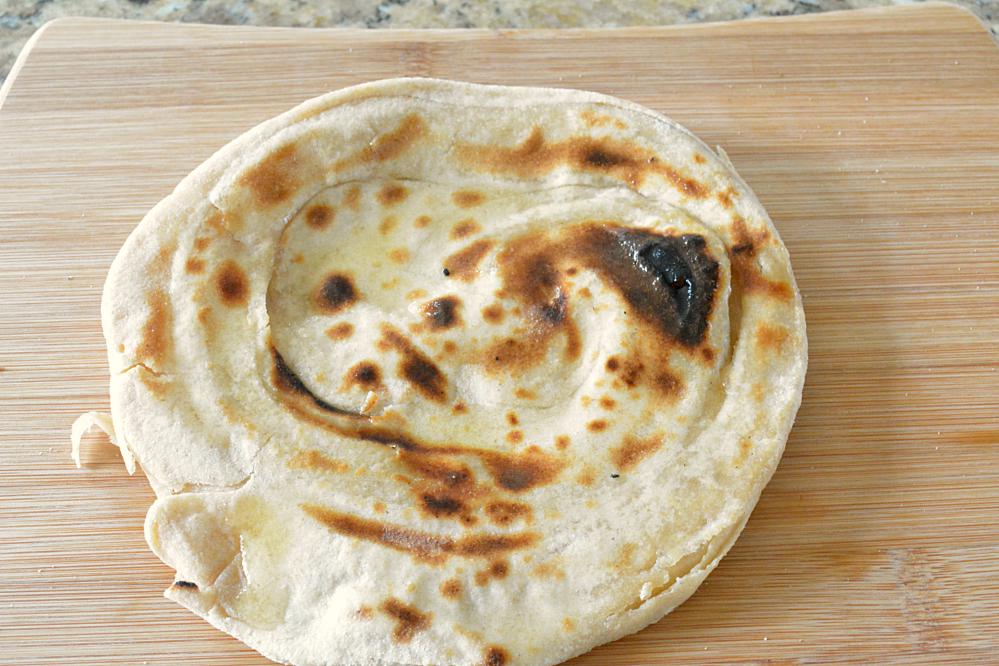 The bottom part of the roti will look like this. If you like it to be extra cooked then keep the kadai on the flame for sometime (in normal position – not upside down).
All done tandoori roti. 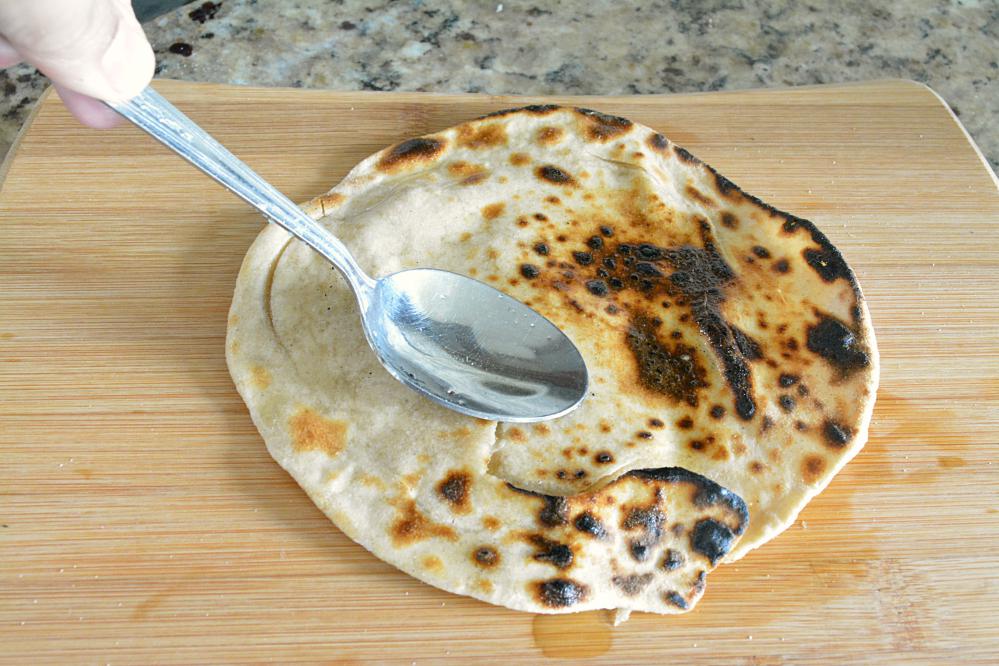
Generously apply ghee on top. If you wish crush the edges of the rotis and store in a container. Repeat the process with rest of the dough. Tandoori rotis are ready. Enjoy warm rotis with Dal tadka or sabzi for your choice.
